Monday, March 26, 2018

Highlights from tonight’s meetup with Phil Seamark


Tonight we had a great presentation with Phil Seamark on DAX as detailed in the meetup group.

I wanted to summarise some of the highlights here –

Phil showed off the below features of DAX.  I tried to link to blog posts from RADACAD

  •  Generate data using the randbetween function
  •  Generate a date table using calendar function -- More information can be found on the blog post here
  • Generate a sales table with fictitious data again using the RANDBetween , generate, addcolumns,  filter, rand etc functions.
  • Create a summary table using the summarisecolumns function. He also explained the advantages of the summary table.
  • He also discussed when to use a calculated column and calculated measure.  Demonstrated the differences between the two very clearly.  More information can be found on a blog post from Reza here
  • Next he introduced the DAX Studio.  This is a great tool that can be used in conjunction with Excel and Power BI. There are many advantages of using the DAX Studio.  Some of them are Viewing your open Power BI data model, Formatting your DAX code, use the DMVs to analyse the performance.  You can also look at the Query Plans and server timings.
  • Next he showed how you can use SQL Server Management Studio to open the Power BI desktop model by connecting to the Analysis services Database that the Power BI Desktop dynamically creates. You can browse through the Tabular model of the database using the Sql Server Management Studio.


Some great questions were also asked after the presentation like
  • What is the difference between Summarise and summarisecolumn function.
  • Can we export the Power BI Desktop model and create SSAS model using Sql Sever Management Studio.
  • What do you think of the Common Data Services ?


And a few more…

I definitely learned a lot in this session. 

Wednesday, March 21, 2018

Migrating to Power BI Report Server – March 2018 from Power BI Report Server – October 2018


Last night, I found out that the Power BI Report Server – March 2018 update is available for download.  So I was very excited to install this and use it for a brand new Power BI report that I was doing.

Again, this has two steps in the migration process as outlined in my previous article of Migrating SSRS 2014 to SSRs 2017.

  •       The first step is to Install the new release of Power BI Report Server on a different machine. 
  •      The second step is to migrate the existing Power BI reports into the new installation.


So here you go – with a run down of the steps that I have followed to migrate.  I did not do an in place upgrade.

Step 1
Installing Power BI Report Server – March 2018

Downloaded the new Power BI Report server from the below link


When you click on the Download button – you will be prompted to choose the files as shown below.  Choose the relevant files and click next


When the download is completed, run the installer file named PowerBIReportServer.exe
Here are some screenshots from my installation.


Choose Developer from the below screen.


Click on the Configure Report Server on the below screen to configure Power Bi Report Server.


When the Reporting Services Configuration launches, make sure you choose the correct instance.
My installation Is showing two instances in the dropdown because I also have a SSRS installation on this server.
I choose the PBIRS as I am configuring the Power BI Report Server.


Service Account Tab  -  Just use the default


Web Service URL Tab  --  


Make sure you are changing the default ReportServer virtual directory to PBIReportServer and clcik Apply


Database Tab  -- On the Database -- click on change Database and create New Database

 Keep the Authentication Type -- Current User -- Integrated Security


 In the below screen ensure that the ReportServer is changed to PBIReportServer.  Then the tempdatabase will automatically change to PBIReportServerTemp database.


 Under Credentials -- Leave the Authentication Type to Service Credentials a shown below.


 Then Click Apply


Web Portal URL Tab -- Under this ensure that the virtual directory is changed to PBIReports from Reports and then click Apply


I did not change any other tabs.  Click Exit from Report Server Configuration Manager


Step 2
Migrate the existing Power BI reports into the new installation of Power BI Report Server March 2018

The next step is to migrate the existing Power BI reports into the new installation.  To do this, follow the below steps.

  • 1Back up the PBIReportServer and PBIReportServerTemp databases from the old Power BI Report Server October 2017 Services installation. 


  • 2.Restore these two databases on to the new Power BI Report Server installation.


Now you will find the reports from the old SSRS server in the new SSRS server if you browse through the url http://localhost/pbireports  on the new Power BI Installation box as shown below.


The next important step is to use the new PowerBIDesktopforRS executable to author the Power BI Reports to publish to this new Power BI Report Server Installation.


Tuesday, March 06, 2018

My experience with migrating SSRS reports from SSRS 2014 to SSRS 2017


In this post I would like to share my experience of migrating our Reporting server from sql server We installed SQL SERVER 2017 on a new VM.  Now I wanted to migrate our SSRS reports to this server.

There are two steps involved to migrate SQL Server Reporting Services to SSRS 2017.

  • ·       The first step is to Install the SQL Services Reporting Services application. 
  • ·       The second step is to migrate the existing reports into the new installation.


Step 1
Installation of SQL Server Reporting Services 2017

In SQL Server 2017, it is available as a separate menu item on the Installation Tab of the SQL Server 2017 Installation center as shown below.


When you click on this, it takes you to the download page of SQL Server Reporting Services as shown below.  


This is because now because of the integration between Power BI Report Server and the Reporting Services there is a separate installer.
Click on the Download button.

 After the file is downloaded, double click on the application and install SQL Server Reporting Services as below.
I have posted some screenshots below.


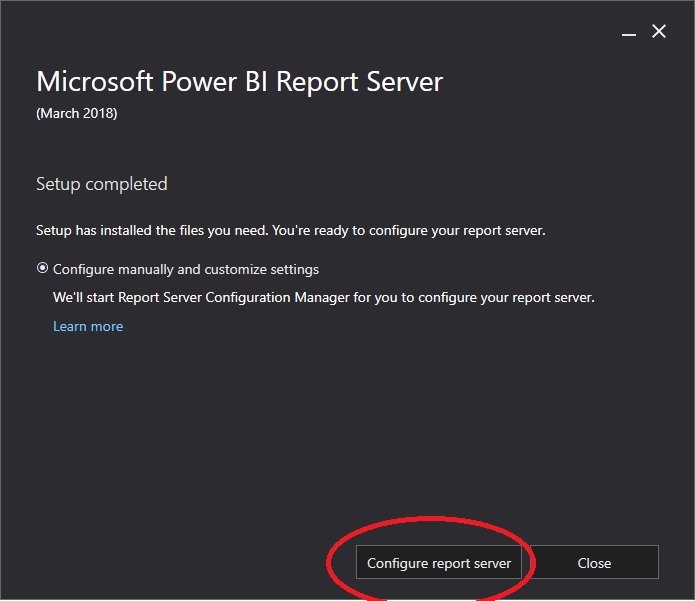
  Choose Developer in the below screen. 


 Choose Configure Report Server in the below screen. 

This will open the Reporting Services Configuration Manager as shown below:


I have not made any changes to the Service Account tab.

On the Web Service URL Tab - I have just clicked apply to get the recommended suggestions updated.

On the Database Tab -- I have clicked on the Change Database button -- Opted for Creating a new database named (ReportServer) and clicked on apply.  This created two new databases named ReportServer and ReportServerTemp.

On the Web Portal URL Tab -- I have clicked  Apply so that the default settings are applied.

I did not make any other changes and clicked Exit.

Now, I tried to connect to the browser url http://localhost/reportserver , then the following error appeared.


To get rid of this error, I followed the below steps.
  1. Bring up SQL Server 2017 Configuration Manager .
  2. Click the dropdown arrow in front of “SQL Server Network Configuration”, and click the “Protocols for MSSQLSERVER”. (If you are using a named SQL Server instance, please select the named instance instead.)
  3. Make sure both the “TCP/IP” and “Named Pipes” protocols are enabled. If they are disabled, enable them by clicking on the dropdown as shown


Then I got an access denied error.  
The report server cannot open a connection to the report server database. The log on failed. (rsReportServerDatabaseLogonFailed) Get Online Help Cannot open database "ReportServer" requested by the login. The login failed. Login failed for user
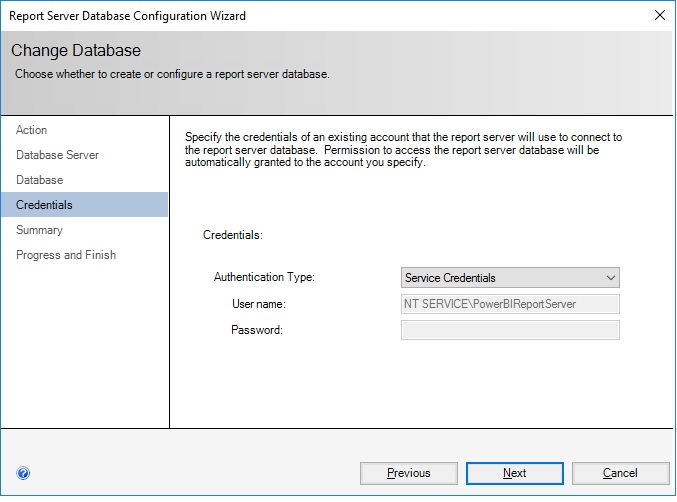
To get rid of this, I followed the below steps
  1. Bring up the  SQL Server Reporting Services Configuration Manager,
  2. Click the "Database" tab and click change credential as shown below.

  1. Make sure the “Current User-Integrated Security” is selected and click Next.
  2. Ensure that the “Authentication Type” is set to “Service Credential”. This will use the user that the Reporting Services running under to connect to the report server database as shown below.
  3. Click Next and Next to apply.


Now I was able to access the ssrs site http://localhost/reportserver

Step 2
Migrate the existing reports into the new installation of SQL Server Reporting Services 2017

The next step is to migrate the existing reports into the new installation.  To do this, follow the below steps.
  • 1.     Back up the ReportServer and ReportServerTemp databases from the old Reporting Services installation. 
  • 2.     Restore these two database on to the new SSRS installation database.


Now you will find the reports from the old SSRS server in the new SSRS server if you browse through the url http://localhost/reports on the new ssrs installation box.

So I tried running a report, but I encountered the below error.


  • The report server was unable to validate the integrity of encrypted data in the database. (rsCannotValidateEncryptedData)
When you restore the ReportServer from a back up, it also restores the encryption keys.  So in order to resolve this error, I had to delete the encryption keys and regenerate them.  To do this go to Reporting Services Configuration Manager and click on Encryption Key tab and click on the delete button and Apply as shown below.


After getting this done, the report execution was successful.

However, when I looked at the Subscriptions of each report, they were not transferred.  So I will be migrating the subscriptions later and I will post my experience.
To be continued…………..

Deploy the Azure Machine Learning Model

In the previous post I have discussed how to create an Azure Machine Model.  In this post I will be discussing how to Deploy this model. Pre...