Below is a process that I follow every year to create a partition in existing multi-dimensional SSAS cubes that I maintain.


Click on Check after providing the query to validate the syntax as shown below.


Tips that I learnt:
- Log in to the SQL Server Analysis Services server using SQL server Management Studio as shown below.

- Expand the Databases by clicking on the + sign. Choose the database you want to create the partition for.
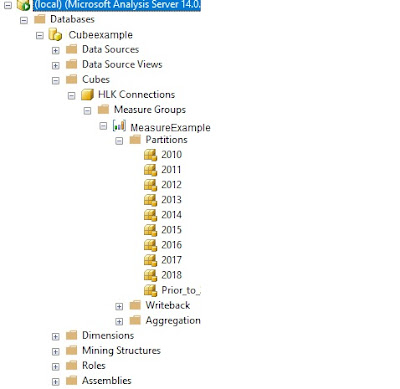
- Expand the Cubes and expand the Cube that you want to partition. Expand the MeasureGroup and expand the Measure Groups – You can see the Partitions folder there. Expand the Partitions folder to see the existing partitions as shown below.

- Right Click on the Partitions folder and click on New Partition as shown below:
- Partitions wizard opens as shown below. Click on Next

- Choose the MeasureGroup and table as shown below. You must choose at least one table to proceed further.

- Click Next
- You need to restrict rows in this partition by providing a query. Tick the specify a query to restrict rows in the below screen.

- Make sure your query selects rows that are included only in this partition. I usually use the where condition that selects data in a year.
- For example select * from [dbo].[cubeExample] WHERE LEFT([DateKey],4) = '2019' This query gives data only for 2019.
Click on Check after providing the query to validate the syntax as shown below.

- If the Syntax check was successful, you will get a success message as shown below.

- If the Syntax Check was not successful, it gives an error. An example error is shown below.

- Fix the error and recheck the Syntax. Click Next. you may be asked for a UserName and Password as shown below.

- Choose Your Processing Location and Storage Location as shown below and click Next

- Choose the Name of the partition on the Next screen and also the Aggregation options as shown below and then click Finish

Tips that I learnt:
- Ensure that you take a backup of the Cube database before creating the partition.
- Ensure that you have the permissions to create the Partitions. Also ensure that the username you use is a generic username and not your own username
- Ensure that you have a look at the query for the previous partitions. Best approach is to copy the query for the partition for the previous year and use that as a starting point.


